Editing Orion
Following on from the SkyHunter’s first trip to the desert, I had a go at stacking and editing some of the image set 05. I had a few goes trying slightly different approaches, which I’ll outline below. I used “standard settings” for things like registering, though realising now I come to writing it up, I don’t have these written down anywhere. I’ve recently had a go at editing some old photos where I’ve had to play with some of the settings I rarely change so it’s a good time to document.
ADD “STANDARD” settings
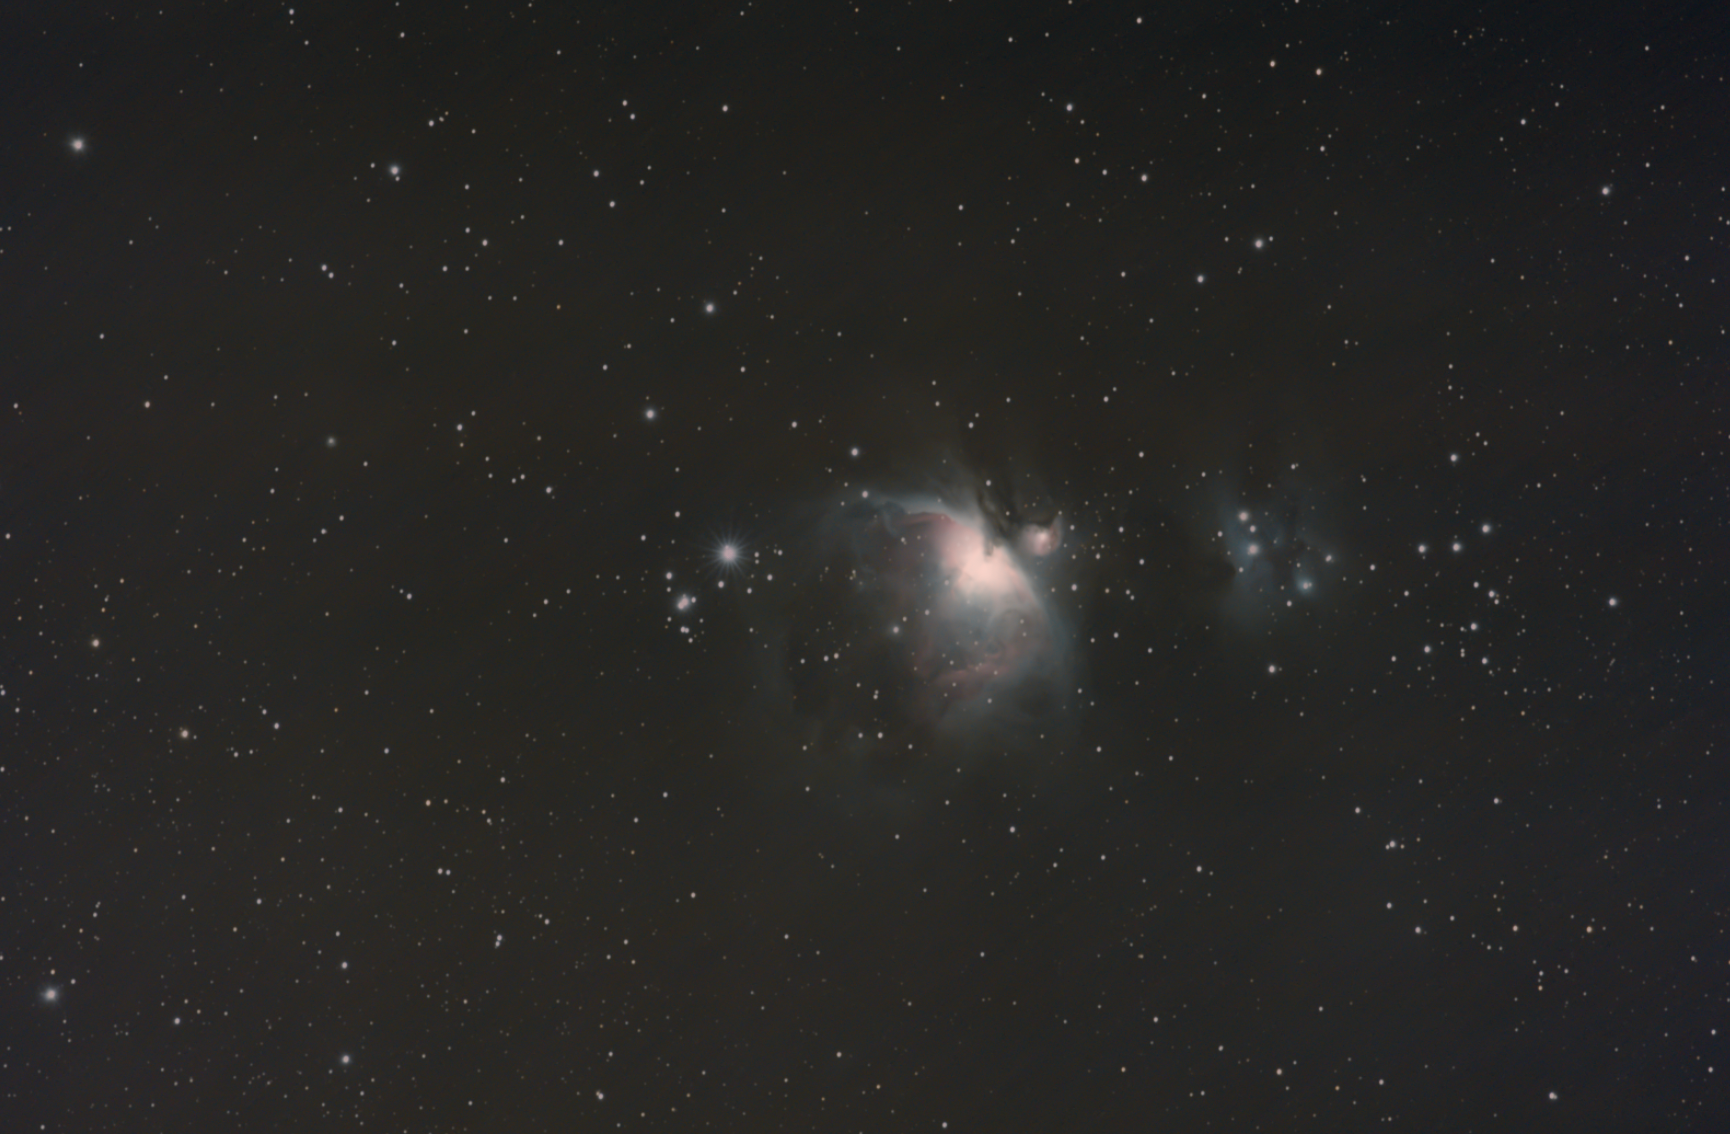
For my first pass (set 05):
- Stacked in siril
- No editing in siril
- Exported as Tif
- Tweaked curves / auto coloured / added a saturated layer
- Saved as psd r_r_250330_05_stacked.psd
Finally getting round to putting this up on the blog, realising it would be helpful to have recorded if I made these changes using the Camera Raw filter, with adjustment layers, or just directly etc. Be good to record more detail with that. I do like this image though, despite the green tinge. It’s got a sharpness and a nice clarity to Iona Orionis (Naif Al Saif) - the double star, and brightest star in the sword (to the left of the main nebula in the centre). Interestingly in the Orion constellation, this is towards the bottom (near the knees), so rotating it 90degrees anti-clockwise would be how we typically think of the orion orientation. The two stars at the bottom (on the left) aren’t Saiph and Rigel though, but Ori D and U respectively.
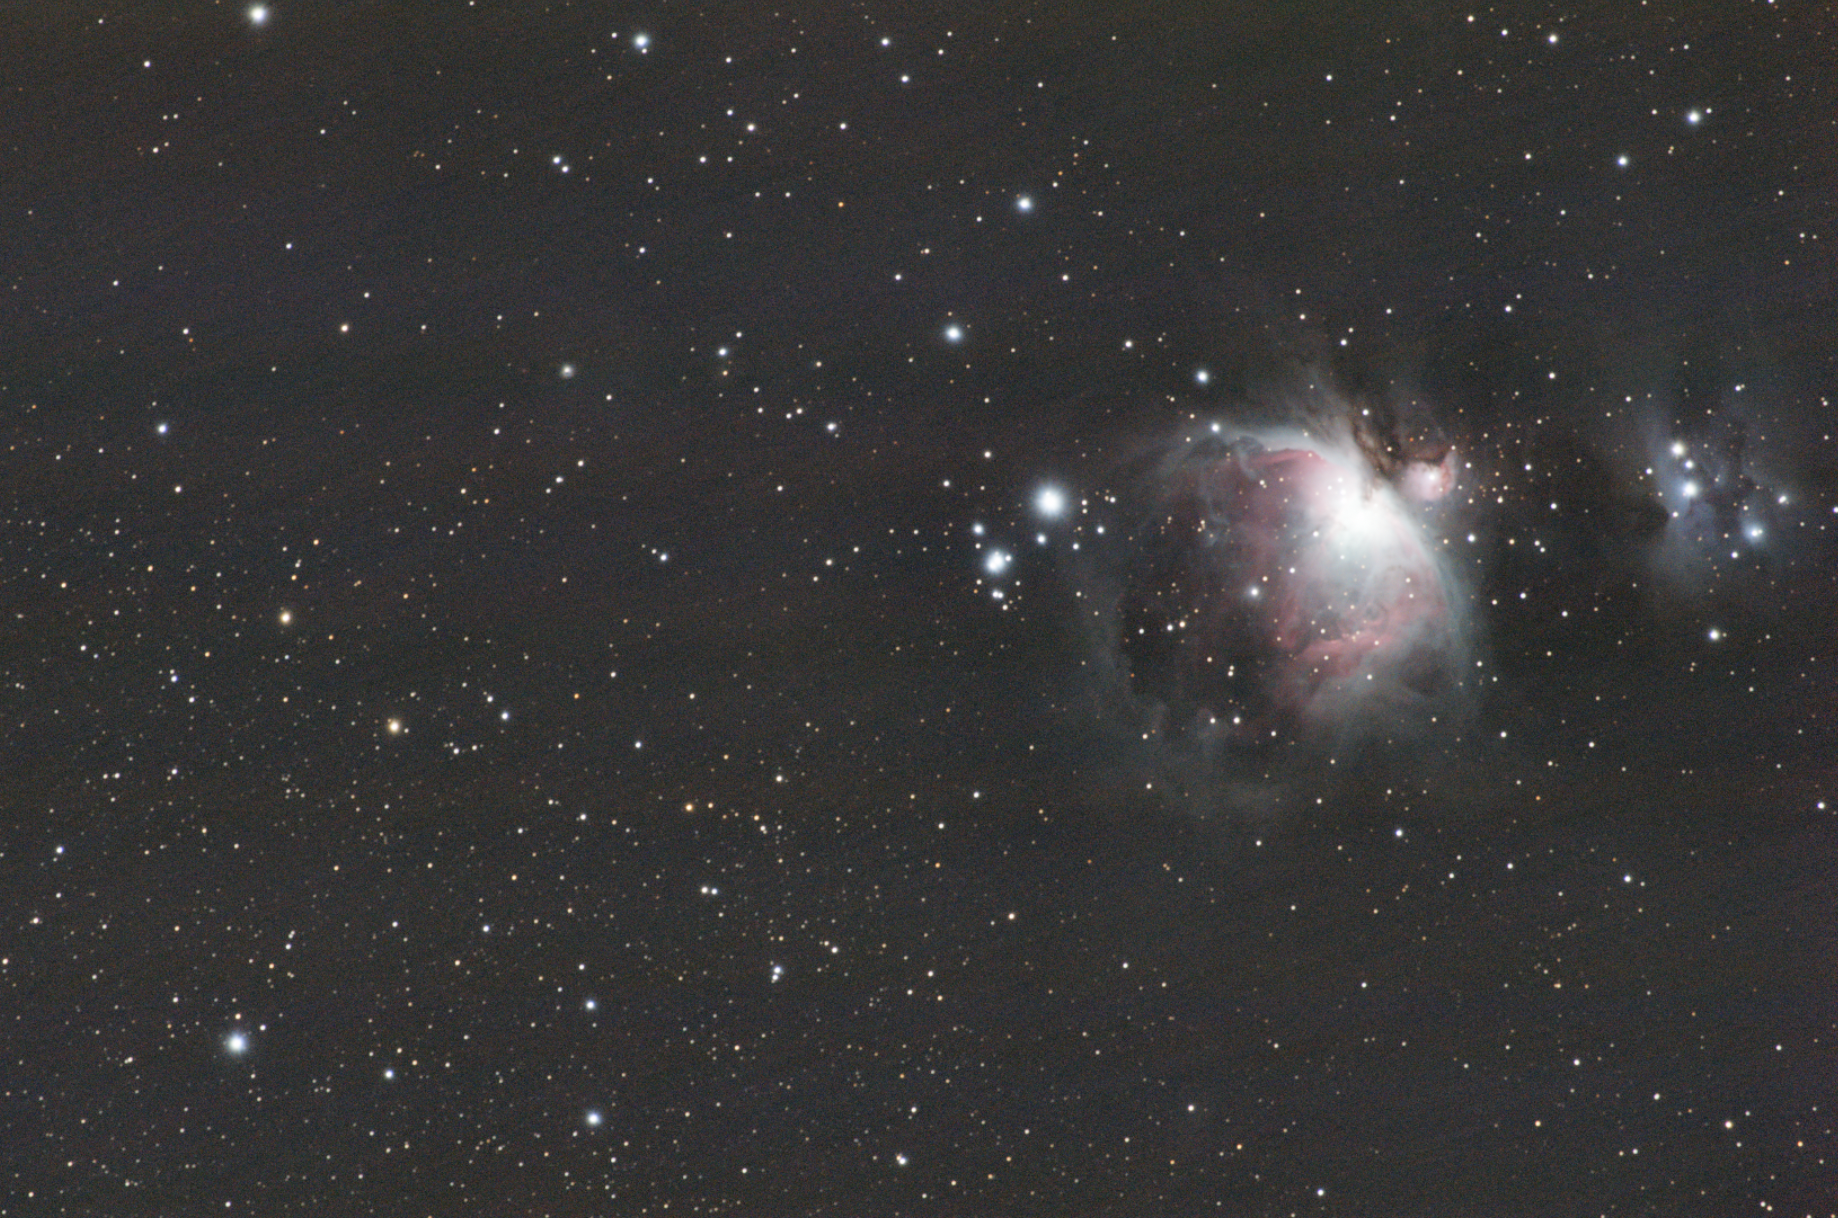
For the second pass (set 05)
The next day I had another go at editing the .psd for the above, I added a colour level adjustment layer and tweaked the green channel level, but couldn’t reduce the green tinge without removing significant amounts of detail.
So, I went back to Siril and used the “Remove green noise” function, but that just looked red… so I undid that and instead used the “Colour calibration > Photometric colour calibration” tool and plate matched to M42 to balance out colours.
Then did some googling… got StarNet2++ working (“with thanks to this article on Cloudynights”) and split out the nebula from the stars, then applied “Remove green noise” (small change but bit better).
Exported as 16bit tif (as 32 bit file sizes are huge and 16bit apparently the sweet spot for size/detail).
Starless:
- Camera Raw
- Light exposure: -0.20
- Color mixer:
- +13 red; +9 oranges
- Color grading:
- Shadows: luminance -100
- Midtones:
- luminance -12
- Highlights:
- luminance +51
- Detail:
- noise reduction -79
- Adjusted curves to make it darker
Nebula:
- Camera raw
- Masked nebula, increased Saturation to +43
- Copied star layer and pasted back in as a layer - set (blend mode) to screen
Mixed feelings on this image. There is more detail visible in the areas overexposed in the first pass, but overall it feels a bit over processed and smoothed out. That said, Iota Orionis is quite sharp - so the splitting out of layers maybe helped preserved the stars, but I lost the sharpness in the way I edited the nebula? Might be worth another try at some point, Orion is below the horizon now till winter so plenty of time to practice!
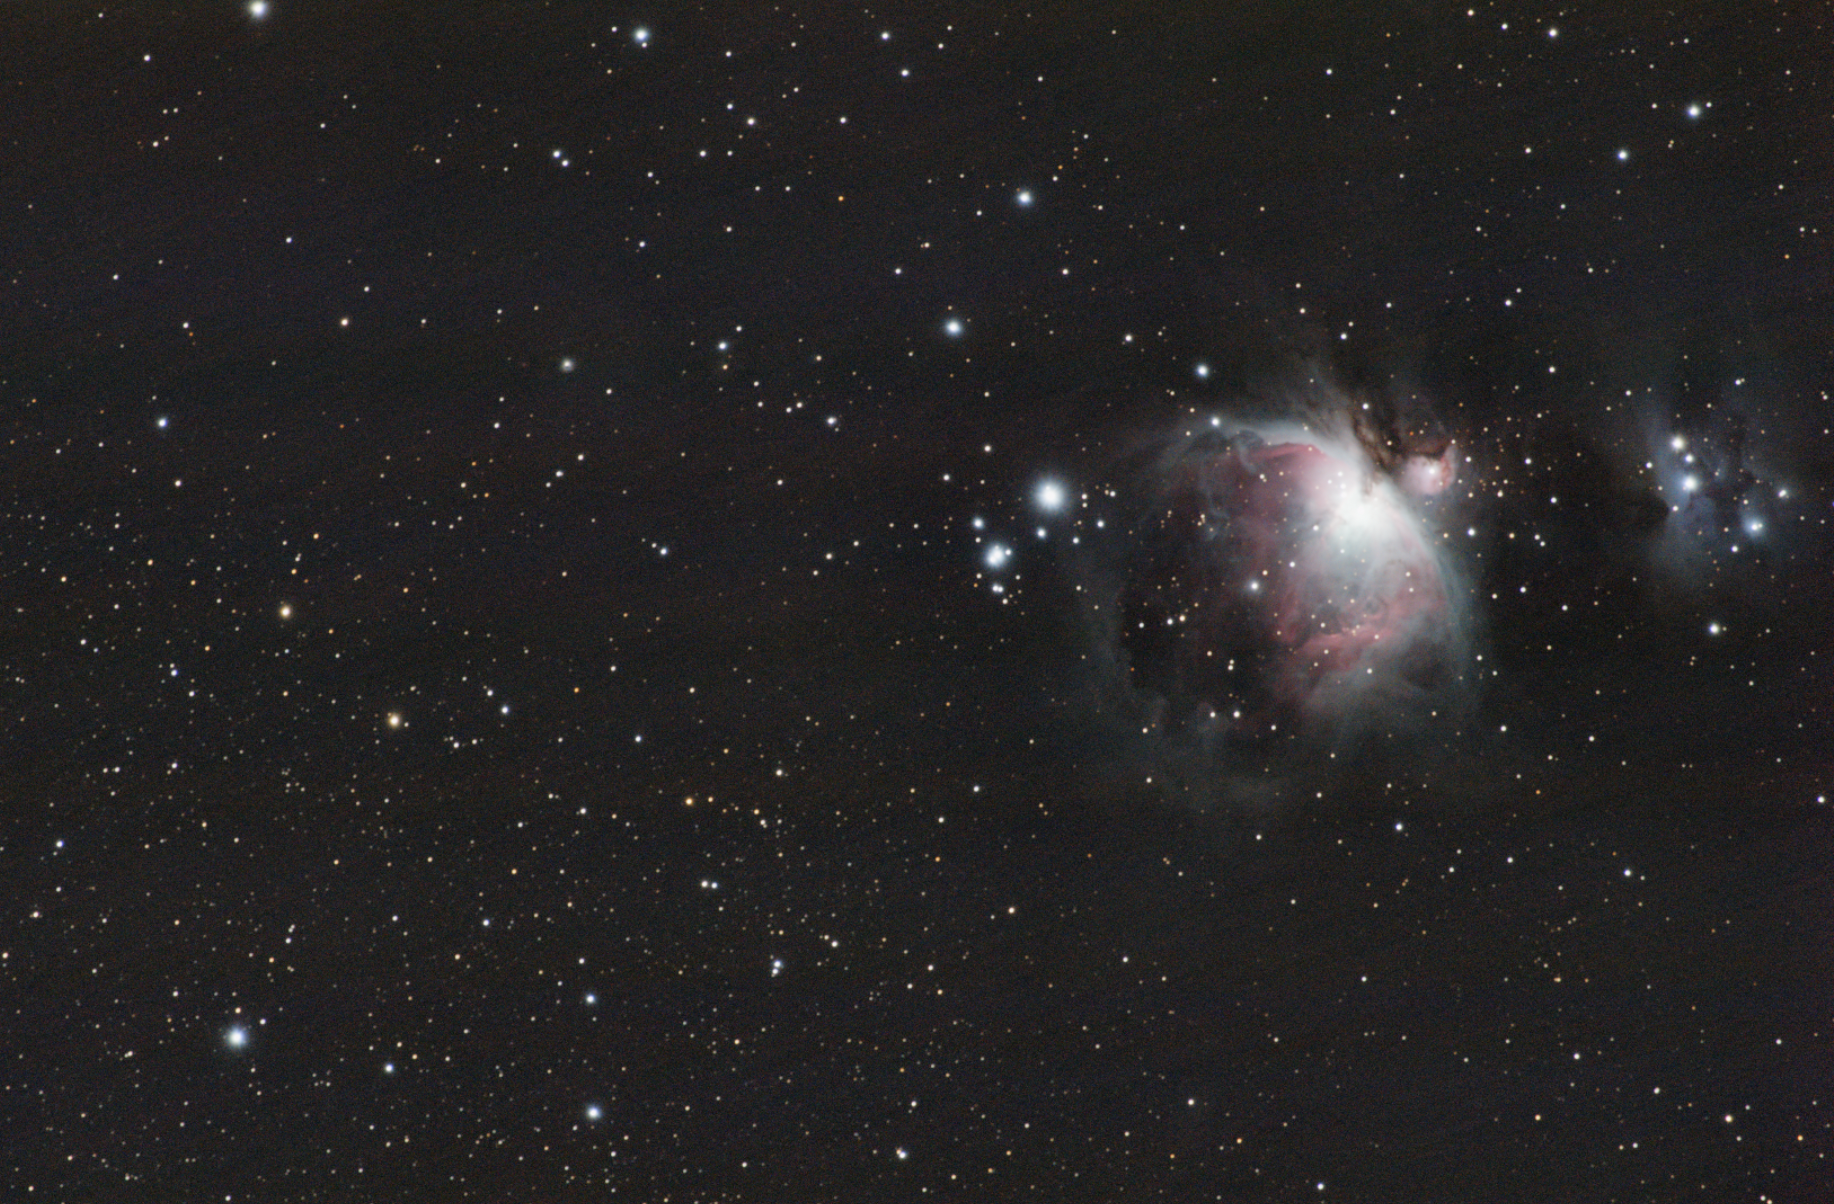
For the third pass I used set 04 Processing takes quite a bit of time, so this set was done on the 13th April.
Initially created in Siril and then without editing, exported (building on learning above) as a 16bit tif. Played around in Photoshop but wasn’t looking great, so went back to the stacked file in Siril.
Note
Finally figured out how to move around / centre the image in siril - CMD and left click
Did the following edits in siril:
- Autostretch
- Background extraction
- Photometric Color Calibration.
- Back to linear
- Asinh transformation
- Increased black point significantly and marginal inc to Stretch
- Colour saturation
- Increased medium amount (0.5)